“If I had to narrow my choice of meats down to one for the rest of my life, I am quite certain that meat would be pork.” ― James Beard

TGIF!!!!

Anyone else as ready for it to be Friday as I am??? Goodness, what a long week. At least it’s been a productive one. One of the most productive things I did was re-signup at the gym. I’ve made a pact with myself.  I MUST go at least twice a week! 3 days would be preferable but I will not beat up on myself if its just 2.

Wish me luck.

I have to admit – I’ve never been one to cook many pork tenderloins. Mainly because they always seem dry.

But alas! I have found one that is not!!!

I made it this past weekend and even though my “pan sauce” separated and didn’t’ thicken as it should – it was still yummo!!

The tenderloin went great with mashed potatoes and roasted brussel sprouts!

The marinade is just awesome.  I think I might try it with chicken.

Recipe adapted from Chef Mommy.

Marinade  (I need a good name for this)

  • ½ cup olive oil
  • 1/3 cup soy sauce
  • ¼ cup red wine vinegar
  • Juice from 1 lemon
  • 2 Tbsp Worcestershire sauce
  • 2 Tbsp fresh parsely (I used dried because it was all I had)
  • 2 tsp dry mustard
  • Fresh cracked pepper, to taste
  • 4 cloves garlic, crushed

Mix all ingredients together. Reserve 2-3 Tablespoons. Marinate 1 lb pork tenderloin in ziploc bag for at least 3 hours.

(Mine marinated all day)

I think the longer the better.

Take the pork from marinade and sear all sides for 2-3 minutes in hot skillet over medium-high heat.

Place in baking dish with several tablespoons of the marinade (from the bag – not the reserved marinade) and bake at 350° for 30-40 minutes.

To make the pan sauce (or try in my case)

Take the skillet you seared your pork in and deglaze with ½ cup chicken broth.  Add the reserved marinade and let boil down for 2-3 minutes. Add 1-2 teaspoons of butter (oops! I think thats where I messed up – I did tablespoons). Stir until melted. Pour over sliced pork.

Do you see all the extra butter floating around??? How could you not?!

A little extra butter never hurt anyone……..

As for the brussel sprouts. Just half or quarter them according to size.

Toss with extra virgin olive oil, garlic salt and fresh ground pepper. Place on a foil lined baking dish.

Roast for 20 minutes at 415°.

Turn them 1-2 times during that time.

I like mine a little black and crispy.

Right now would be a great time to sprinkle a little Parmesan cheese!

Even with the ugly looking pan sauce this meal was a winner!

Will definitely make again!

On another note – it’s always great to have these nice meals with all the different ingredients, but I gotta tell you – that grilled cheese sandwich that I made tonight (with plain old white sandwich bread, a cheese slice and butter) was like a little slice of heaven after a long day.  I finished it up with Ben & Jerry’s New York Super Fudge Chunk straight from the carton, in my pajamas, watching the first college football game of the season. I am one happy, happy girl. 🙂

abp

“The sea, once it casts its spell, holds one in its net of wonder forever.” – Jacques Yves Cousteau

Good Morning!!

Hope everyone is having a fabulous day so far!!!

Does this look good???

Well, it was very good!

Club Sandwiches – so much better than a regular old ham/turkey sandwich.

And not that much harder to create.

  1. 3 pieces of bread, toasted
  2. a little mayo
  3. ham, turkey and cheese
  4. lettuce and tomato
  5. salt and pepper
  6. and of course – bacon!

Also – you have to have the little frilly toothpicks!

But the trick that makes this club better than any other club I have had is that it is sprinkled with good shake of oil and red wine vinegar. Gives it a great kick and keeps it from being dry!

Serve with thin, crispy potato chips and a pickle wedge – takes me back to where I first had this sandwich.  Crackers Restaurant (which unfortunately closed many years ago) – at the Villa’s by the Sea Resort on Jekyll Island (my favorite place on earth).  I always felt so grown when my mom and I (probably around 10-11 at the time) would go there for lunch while my dad was on the golf course. I felt like a lady lunching (is that a word??). I loved it so much, my mom would recreate it for me when we came home and she did it again for me this past Sunday at my request. 🙂

As I have said before – it’s the little things in life that count.

abp

“My idea of bliss is to wake up on a Monday morning knowing you haven’t a single engagement for the entire week. You are cradled in a white paper cocoon tied up with typewriter ribbon.” – Edna Ferber

Mondays. How quickly they seem to come around. I really don’t mind Mondays – it’s just that Tuesday follows Monday and that’s when the work week starts for me.

Mondays are a great day for me to catch up on everything and get everything prepared for the next week with very few distractions. Also – it’s the day I prepare a new meal to test out on the peanut gallery.

Today’s meal will be:

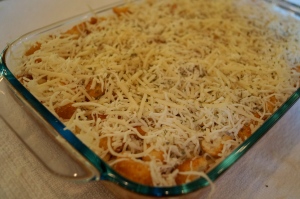
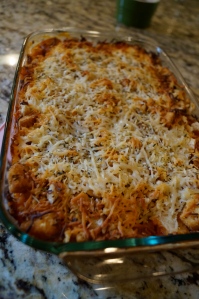
Chicken Parmesan Casserole

(recipe adapted from foodwishes.com)

  • 2 Tbsp of olive oil
  • 2 cloves of garlic, crushed
  • hot red pepper flakes, to taste
  • 3-4 boneless, skinless chicken breast, cut into bite size pieces
  • 2 cups of your favorite marinara sauce
  • ¼ cup chopped basil
  • 8 oz shredded mozzarella cheese
  • 4 oz shredded parmesan cheese
  • 1 (5 oz) package of garlic croutons

Preheat oven to 350°.

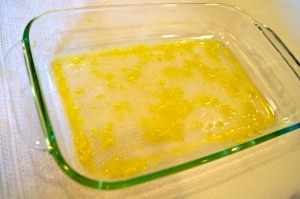
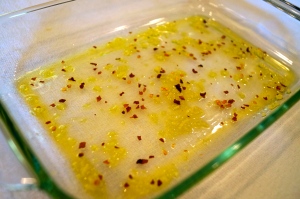
You start by pouring olive oil into a baking dish (the size determined by how much chicken you have). Next crush your garlic into dish. Mix garlic in and evenly spread on the bottom.

Sprinkle with hot pepper flakes.

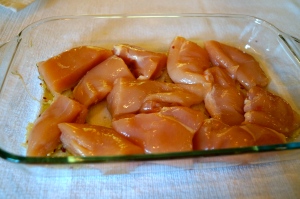
Now place your cut up chicken in dish. The original recipe had it as whole chicken breasts but chicken breasts are so big nowadays that I think one is too big a serving so at least halving them will make the recipe go farther.
Of course, you can always leave them whole if you’re feeding hungry hippos or you could even cut chicken up into smaller pieces. (I think next time – time permitting – I’ll cut into 1 in. pieces)

******note – there has been a few problems of the chicken not being completely cooked because each oven is different so I would definitely cut chicken into bite size pieces and not just halved or whole to eliminate this problem.

Pour marinara sauce evenly over chicken and top with basil.

Layer with half the mozzarella and parmesan cheese. (I also added a sprinkling of dry italian seasoning to both cheese layers)

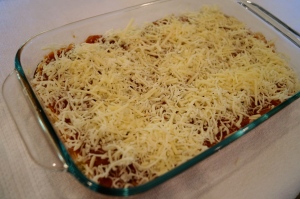
Top with croutons (I crushed them in the bag with my hands a little first) and the remaining cheese. (Next time, I will crush even more)

Bake uncovered for 30-40 minutes. You want to make sure chicken is done, so if the top starts to brown a little too much, cover with foil.

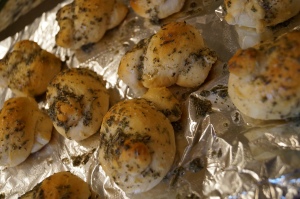
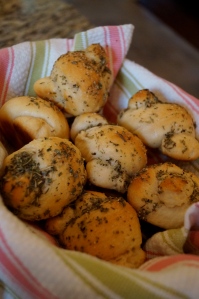
Here you go – Chicken Parmesan Casserole – serve with a salad and Parmesan Knots (see below).

For the Parmesan knots you’ll need:

  • 1 tablespoon of melted butter
  • ¼ cup oil
  • ½ teaspoon garlic powder
  • 2 Tablespoons of grated parmesan (the kind in the green can)
  • 2 teaspoons dry italian seasoning
  • 1 can refrigerated buttermilk bisuits

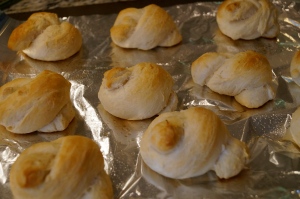
Take each biscuit and pull/roll out into a rope, tie in a knot, tuck ends under and place on a foil lined, Pam sprayed baking sheet.

Bake at 400° for 8-10 minutes or until golden brown.

In a small bowl, combine all ingredients

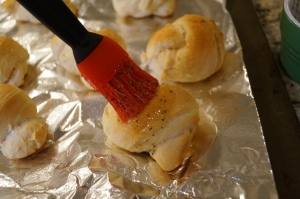
Brush mixture onto warm rolls.

Now you have a perfectly simple, perfectly good Italian Dinner.

Thumbs up from the peanut gallery!

🙂

abp

“Man cannot live by bread alone; he must have peanut butter.” ~ James A. Garfield

Very busy day at work on Wednesday, followed by a great start to my Wednesday night Bible Study. Not to mention the great meal served beforehand! I’m totally going to get used to this not cooking on Wednesday deal!

If you do not know – I work late on Wednesdays and Thursdays so I never cook on Thursday (usually a date night with the mom) and I only cook on Wednesday if it’s a casserole I made ahead of time or a crockpot meal. Now I will not have to worry about Wednesdays for the next 15 or so weeks! I’m especially grateful because my friend, the great and wonderful cook – Ashley H. is back at the helm so the food will be awesome!!!

I know you’re thinking – but wait – I thought you liked to cook.

I do!!! Just not when I’m pooped. And I’m pooped on Wednesdays and Thursdays!

I had another very busy day at work Thursday – dinner with the mom.

And Friday night was an awesome date night with the DH at Kozy’s. Kind of funny though – they were hoppin’ that night and ran out of grits – so my shrimp ‘n grits turned out to be shrimp ‘n potatoes. Hey – a carb’s a carb in my book!

So my hiatus from the kitchen is over for the week.

Time for Creamy Peanut Butter Tart.

This recipe comes from the blog Mel’s Kitchen Cafe – she has awesome recipes!

The only change I made was that she made her own graham cracker crust and I bought one at the store. I think its wonderful to make it completely homemade but it can get to the point that it will not be made at all because there are just too many steps.

So, I cheated a tiny bit.

Creamy Peanut Butter Tart

  • 1 graham cracker pie crust
  • 3 ounces of milk or semisweet chocolate, finely chopped (I used morsels because that’s what I had on hand)
  • 1 ½ cups heavy cream, divided
  • ¾ cup creamy peanut butter
  • 4 ounces cream cheese, softened
  • 1/3 cup sweetened condensed milk

Place chocolate in a small bowl. Heat ½ cup of heavy cream in sauce pan over medium heat until simmering and pour over chocolate. Let sit for 3-5 minutes and then whisk it until well combined.

Spread chocolate mixture over crust and chill in refrigerator for about 20 minutes.

Next, with a handheld mixer combine cream cheese, peanut butter and sweetened condensed milk. Blend until sooth. Now add the remaining 1 cup heavy cream and beat mixture for 1-2 minutes until light and fluffy.

Spread peanut butter mixture evenly over chocolate layer and smooth out to edges.

Refrigerate for 2 hours or overnight.

Serve chilled with a dollop of whip cream and mini chocolate chips.  This is yum-o! A great dessert to serve after a big meal because it’s not too sweet or too heavy!

You really just can’t go wrong with peanut butter and chocolate!

pb

I hope everyone has a great start to a new week!

Coming later this week:

Super Moist Pork Tenderloin with Pan Sauce

and

Chicken Parmesan Casserole and Parmesan Knots

abp

“Between the optimist and the pessimist, the difference is droll. The optimist sees the doughnut; the pessimist the hole!” – Oscar Wilde

The day has finally arrived! After over a year since it was destroyed by the April 27th, 2011 tornados – Krispy Kreme has reopened!!! YAY!!!!

And I was lucky enough to have a sweet hubby who stood in line for an hour this morning and brought me some to work.

Well, a lot of it had to do with the fact that my adorable stepson is the biggest KK fan ever! And this past weekend that’s all he could talk about. So, this morning at 6:45 a.m. the two of them headed out to brave the crowds!!

(people had even camped out the night before!)

Oh Oh! You know it was worth it, though! HOT NOW donuts are the best. I mean the best. They evaporate on contact with your mouth! That’s why you can eat 6 of them and not blink an eye but that means they also evaporate off you butt too, right???? Well, at least, that’s how I’m going to think about it.

Do you know there is an app for you phone that tells you when they are “HOT NOW”?

There is. I’ve got it. 🙂

(click on pic for more info)

In honor of this special occasion, I will be making a Krispy Kreme donut bread pudding next week.

(I’m going to let those lines die down a bit first.)

How sinfully good do you think that will be?? Oh boy, oh boy, oh boy!

Weeeelllll, not too much else going on today.  I think after dinner (which consists of Taco Soup pulled from the freezer) I might try and whip up that Creamy Peanut Butter Tart.

Until then.

abp

“I love a rainy night, I love a rainy night, I love to hear the thunder, Watch the lightning when it lights up the sky. You know it makes me feel good.” – Eddie Rabbitt

I hate that I have been MIA for the passed few days but I worked late on Thursday and then the weekend was just crazy busy! In a good way – there just was not any time to sit down at the computer.

Also, I did try a cookie recipe but it was a FAIL. So I didn’t post about that. 😦

It’s been quite rainy here and I love it. Maybe I’m weird but rain makes me happy. Granted I would not want it all the time but I welcome it most anytime – as long as I’m not on a trip sightseeing. Or at the beach. Or Disney World. Or driving a long way. Ok, well maybe I just like it to rain when I’m home or at work or at church. There is something comforting about it.

As fun as the weekend has been and as much as I love to go out and eat, I’m happy to be back in the kitchen.

Tonight I’m trying a Paula Deen recipe. Two actually.

Quick Italian Salad and Chicken Pesto Pasta

The salad is simple.

Grab a bag of Italian blend salad mix and a cup of halved cherry tomatoes. Toss.

(I totally forgot to add the tomatoes in – duh)

Next whisk up the following in a bowl.

  • 1 envelope of zesty italian dressing mix
  • ¼ cup olive oil
  • ¼ cup balsamic vinegar
  • 3 tablespoons of prepared ranch dressing.

You then drizzle the dressing over salad and refrigerate any leftovers up to 2 weeks.

Of course I must add Parmesan cheese and croutons.

For the Chicken Pesto Pasta you will need:

  • 1 (16-ounce) package fettuccine (didn’t have – so used linguine)
  • 1 pound fresh chicken tenderloins (I used cutlets)
  • ½ teaspoon salt
  • ½ teaspoon ground black pepper
  • 1 tablespoon olive oil
  • 1 small onion, thinly sliced
  • 1 red bell pepper, thinly sliced
  • 1 yellow squash, halved lengthwise and thinly sliced
  • 1 zucchini, halved lengthwise and thinly sliced
  • 2 cups heavy whipping cream
  • ¼ cup prepared pesto (I used around a ½ cup)

First, cook fettuccine according to package directions, drain, set aside.

Heat olive oil in large skillet over medium heat.  Season chicken with salt and pepper and cook for 2-3 minutes per side, or until golden brown.

Remove and cut into ½ inch pieces.

Add onion and bell pepper to skillet and cook for 3-4 minutes, or until tender.

Next, add squash and zucchini and cook and additional 3-4 minutes.

Stir in cream and pesto and cook for 5 minutes – so it is slightly thickened.

Add pasta and chicken, toss to coat and to warm back up.

Serve with garlic bread or these Parmesan Knots that I really like to do – I’ll have to share that recipe with you sometime soon!

As I mentioned last week – the peanut gallery will not be getting dessert since they are getting dinner but I do hope to be making a Creamy Peanut Butter Tart later in the week they can taste test for me!!! Keep an eye out for that!

****This is my take on the pasta (fyi – the peanut gallery loved it), I think the sauce was missing something. That was one reason I added more pesto. I believe it needed to be finished off with wine or chicken broth to give a little more flavor, maybe saute some garlic with it too. It was a little bit too much just cream for me. Get what I’m saying? – no kick. It was really good but next time I make it – I will doctor it up. But hey – that’s just me, some people like it more on the tame side. ****

I hope everyone had an enjoyable weekend. These weeks are just flying by!! Christmas is just around the corner and that makes me hyperventilate.

Don’t get me wrong – Christmas is my favorite time of the year! It’s just that I will be hosting Thanksgiving and Christmas dinner – that plus 3 trees and a Christmas village. Whew. I’m tired just thinking about it……..

~Catch ya later~

abp

“Life is better than death, I believe, if only because it is less boring and because it has fresh peaches in it” – Thomas Walker

Seriously y’all – I gotta start this diet.  I’ve been eating waaaaay too much of the food I have been cooking! I need to just cook it, taste it and give it away!!!!

Until I lose this 7 lbs that is  – then I’ll start eating again and the whole process will start over!! 🙂

Monday night after the enchilada casserole, we had homemade peach crisp with chilled maple cream sauce. Oh honey, we were all in a food coma – sprawled out in the den like a bunch of beached whales!

It was then and there that I announced – “Peanut Gallery – you either get dinner or dessert! Not both anymore!” and they readily agreed. So some nights will be dessert nights! That could be a really good thing!

Let me tell you about this peach crisp.  Mmm Mmm good!!! I’ll show you a picture later to prove it!

Peach Crisp with Chilled Maple Cream Sauce (adapted from the great Pioneer Woman)

  • 5 whole To 6 Whole Fresh Peaches (best When Not Overly Ripe Or Soft)
  • 1 cup Flour
  • 1/2 cup Sugar
  • 1/2 cup Light Brown Sugar, Firmly Packed
  • 1/2 teaspoon Ground Cinnamon
  • 1/2 teaspoon Ground Nutmeg
  • 1/4 teaspoon Salt
  • 1 stick Butter (1/2 Cup)
  • 1/2 whole Lemon
  • 7 Tablespoons Real Maple Syrup, Divided
  • 1-1/2 cup Whipping Cream
  • 3 Tablespoons Light Corn Syrup

I would start with the cream sauce so it can be chilling in the fridge.

Put the cream, maple syrup and corn syrup in a small sauce pan and stir over moderate heat until thickened and reduced by about one-third, approximately 15 minutes. Refrigerate until it has chilled and thickened even more.

Onto the peach crisp:

Place peeled peaches in a bowl (let me tell you – I do not like the job of peeling peaches). Add in the zest and juice from the half lemon and stir in 2 tablespoons of maple syrup. Mix well.

Pour peaches into a small pan (I used a deep pie plate).

In another bowl combine flour, sugar, brown sugar, cinnamon, nutmeg and salt.

Then work the cut up butter into the flour mixture with a fork until evenly mixed. (I let my butter get a little too soft and I ended up mixing it with my hands)

Crumble mixture on top of the peaches.

Cover tightly with foil. Bake covered for 15 minutes at 350°. Remove foil and bake for additional 20-30 minutes until browned and crisp. I took her advice and turned the broil on for a few minutes before I took it out.

Serve warm with the chilled maple cream sauce drizzled on top.

Well, I decided to drizzle the cream sauce on top of the ice cream I plopped on it – you know – just to cool it off. 😉

So, I told you earlier that I had a picture proving how good it was……

Here’s your proof:

There were only 4 of us.

That’s immediately after a very large dinner.

You see why I’m talking diet?

Enjoy!

abp

“If you buy chocolate with loose change the calories don’t count.” ― Janet Evanovich, Ten Big Ones

I love a rainy Monday! Good day to stay in and do some cleaning. I’m still working on getting settled in so I’m always looking for the right place for everything. No matter what I do there never seems to be enough space. (Maybe I just have too much junk)

Example being – loose change. It adds up (which is a good and bad thing). What do you do with yours?  Back in my apartment (and then it moved with me to my old house) I had cleaned out one of those huge popcorn tubs (a Shrek one, none the less) from the movie theater and used it for years.  I eventually filled it and plan on cashing it in but I guess I want to upgrade a bit from the cardboard Shrek bowl.

This morning, I cleaned out the junk drawer (which was consumed with change) and without any better ideas, I washed out a fairly attractive plastic pot from which the plant had been transplanted. It will work for now. I’ll just hide it in a corner.

Whatcha think?

So last week I made enchiladas – which were awesome! So how do you improve on that???

Make an enchilada casserole!!! We southerners love us some casseroles!!! It’s creamy comfort in a pyrex dish! The peanut gallery should all appreciate this – well, almost – the DH dislikes anything that has the word “creamy or cheesy” in the title. But that’s just a mind thing because once he tastes it – that all goes out the window!! Gotta love him!

I adapted this recipe from Get off Your Butt and…..Bake. Love that name!

Cheesy Enchilada Casserole

  • 1 pound lean ground beef ( lean)

  • 1 large onion, chopped

  • 2 1/2 cups salsa

  • 1 can (15 ounces) black beans or red kidney beans, rinsed and drained

  • 1/4 cup reduced-fat Italian salad dressing

  • 1 pack of Taco seasoning

  • 6 flour or corn tortillas (8 inches)

  • 1 small can of mexicorn, drained

  • 3/4 cup sour cream

  • 2 cups shredded Mexican cheese blend or your favorite cheese

  • 1 cup shredded lettuce

  • 1 medium tomato, chopped

  • 1/4 cup minced fresh cilantro

    You start by browning you meat and onion, drain.

    Next mix in your beans, corn, salsa, dressing, seasoning.

    Then stir in your sour cream.

    In a 2 quart baking dish, put a thin layer of the meat mixture down, so there will not be any sticking.

    Place a flower tortilla on the bottom and layer with 1/3 meat mixture and cheese.

    Repeat 2 more times, topping off with a generous amount of cheese.

    Bake at 350º for 30 minutes or until hot and bubbly.

    Serve with shredded lettuce, tomatoes and cilantro. (I’ll add a dollop of sour cream too!)

    Mexican cornbread will go great with this and just so you know (although, I’m sure you already did) things in my kitchen do not always turn out right.  So why not show you that too. 🙂

    Here’s my mexican cornbread – not to mention, I burned the snockers out of my finger when this fell apart! Oh well!!

    One good thing about ugly cornbread is that I didn’t mind cutting (scooping) myself a piece while it was still hot. Couldn’t look any worse!

    ’till next time folks!

    abp

“I hear lake water lapping with low sounds by the shore; While I stand on the roadway, or on the pavements gray, I hear it in the deep heart’s core.” – William Butler Yeats

Fabulous day! For starters, the weather could not have been better – it felt like fall when I walked outside to get the paper.

NO humidity!!!!

So after coffee and a couple loads of clothes, it was off to Church – the service was great, as usual. 🙂

Then it was home to shed the spiffy duds and off to the lake with a quick stop at KFC’s drive through – have you tried their new chicken bites??? If not, I recommend you do – yummy!

The next few hours were spent bobbing around on our floats working on our tans, yapping away with my mom and the hubby as he read on the dock. It really is the simple things in life that make it special.

When I returned home (a touch pink) I really wanted to cook something simple and light. So I decided on Spicy Lemon Butter baked red snapper and a lemon orzo salad with asparagus and tomatoes.

The salad is adapted from SparkRecipes.com – lots of good healthy recipes on this site. The snapper recipe is from my dear friend Dianne, who whipped this up last time she was at the beach and she passed it on to me. (Thank you D.C.!)

Lemon Orzo Salad with Asparagus and Tomatoes

  • 6 oz of orzo pasta
  • ½ bunch of skinny asparagus, cut into 1 inch pieces
  • ½ pint of grape or cherry tomatoes, quartered
  • 1 lemon, zested and juiced
  • 2 Tablespoons of extra virgin olive oil
  • 1 clove garlic, minced
  • 1 Tablespoon fresh parsley minced
  • kosher salt (to taste)
  • fresh ground pepper (to taste)
  • ¼ cup grated Parmesan cheese

Start by boiling 2 large pots of salted water.

Cook orzo according to package in one and blanch the asparagus for 2-3 minutes in the other. Drain pasta and remove asparagus with slotted spoon to an ice bath to stop the cooking process.

Combine orzo, tomatoes and asparagus in large bowl.

In a small bowl, whisk together olive oil, lemon zest, lemon juice, garlic, parsley, salt and pepper.

Mix all ingredients together and then stir in Parmesan cheese.

This can be served warm, room temperature or chilled. I liked it chilled – great summer salad!

The snapper (bought from my fish man, Bayou Joe) was super easy and very flavorful!!

Place the snapper skin down in baking dish. Pour 1 stick of melted butter over the filets, sprinkle with cajun seasoning, garlic salt and cover with lemon slices.

Bake at 425° for 25 minutes.

There you go! Simple and healthy!!

Now I’m off to watch the Olympic Closing Ceremonies!!

Hope everyone had a super fabulous weekend!

abp

“A human being isn’t an orchid, he must draw something from the soil he grows in.” – Sara Jeannette Duncan

Today is a good, no great day!!! For two reasons – 1) It’s Friday!! 2) It’s the first day that I feel back to normal. Wednesday I was starting to wonder if that would ever be the case!

So after work, I headed to the store to get to the couple of items I needed to make Salted Nut Bars or as I have renamed them – Friday Paydays . And when I walked in, there were the most gorgeous orchids I had ever seen!! (at Winn Dixie – I know) Considering I am still in mourning because the orchid I had been nurturing for the past several months had faded away a few weeks ago – there was no question that one of those beauties were coming home with me!! Of course, the one I wanted was the one on the top and my short self looked like a spaz try to reach it with out knocking over all the others. Oh well, nothing new about that.

Here she is!!!!

Okie Doke – on to the Friday Paydays. I call them that because it’s Friday, many people get paid on Friday and they taste a whole lot like the Payday candy bar.

They are also addicting. I’m typing with sticky fingers because I can’t stop eating them long enough to finish this post!

These are quite simple to make. 5 ingredients and no baking!

(I found this recipe on the blog Bake or Break.)

  • 3 cups salted peanuts (no skins), divided
  • 2 & 1/2 tablespoons butter
  • 2 cups peanut butter chips
  • 14 ounces sweetened condensed milk
  • 2 cups miniature marshmallows
  • kosher salt or sea salt, optional

Start by layering half the peanuts in the bottom of a 7″x11″ baking dish.

Over low heat, melt butter and peanut chips, stir til smooth.

Now, mix in the sweetened condensed milk.

Once this is combined – stir in marshmallows until melted and smooth.

Pour mixture over peanuts.

Sprinkle the remaining peanuts on top.

If you prefer more saltly with your sweet and salty snack – add a little sea salt or kosher salt.

Cover and refrigerate until chilled. Cut into bars.

Weeelllll, I did this and they taste absolutely fabulous but they didn’t set up perfectly.  You can cut them into bars and eat them but if you stored them cut they would kind of want to stick to each other because they are fairly soft/sticky.

This by no means is to deter you from making these, I just hate that I couldn’t really box them up pretty and give as a gift. Seems to be better served from the baking dish.

Regardless – they are yum yum good!!!

They finished off our dinner perfectly. BTW – we had spaghetti with this new pasta sauce I found at publix that had whole roasted garlic cloves in it – AWESOME! (I doctored it up a little of course ;))

Take a look.

Now off for a walk and then in the bed to watch the first of the three Bourne movies so I’m ready to go see the new Bourne Legacy movie at the theater this weekend!

’til later

abp