“Do you know how helpless you feel if you have a full cup of coffee in your hand and you start to sneeze?” ~ Jean Kerr

I’m still enjoying the new kitchen so I’ve been spending quite a bit of time in there.

This has made the men in my life happy.

The following is a very simple recipe I can honestly say I wasn’t expecting to be anything special but it got rave reviews from the family.  Unfortunately, I have had a nasty cold and I couldn’t really taste it so I’m taking their word for it! These colds our little princess brings home from school really knock mommy on her butt.

I have caught every. single. one. Totally over it.

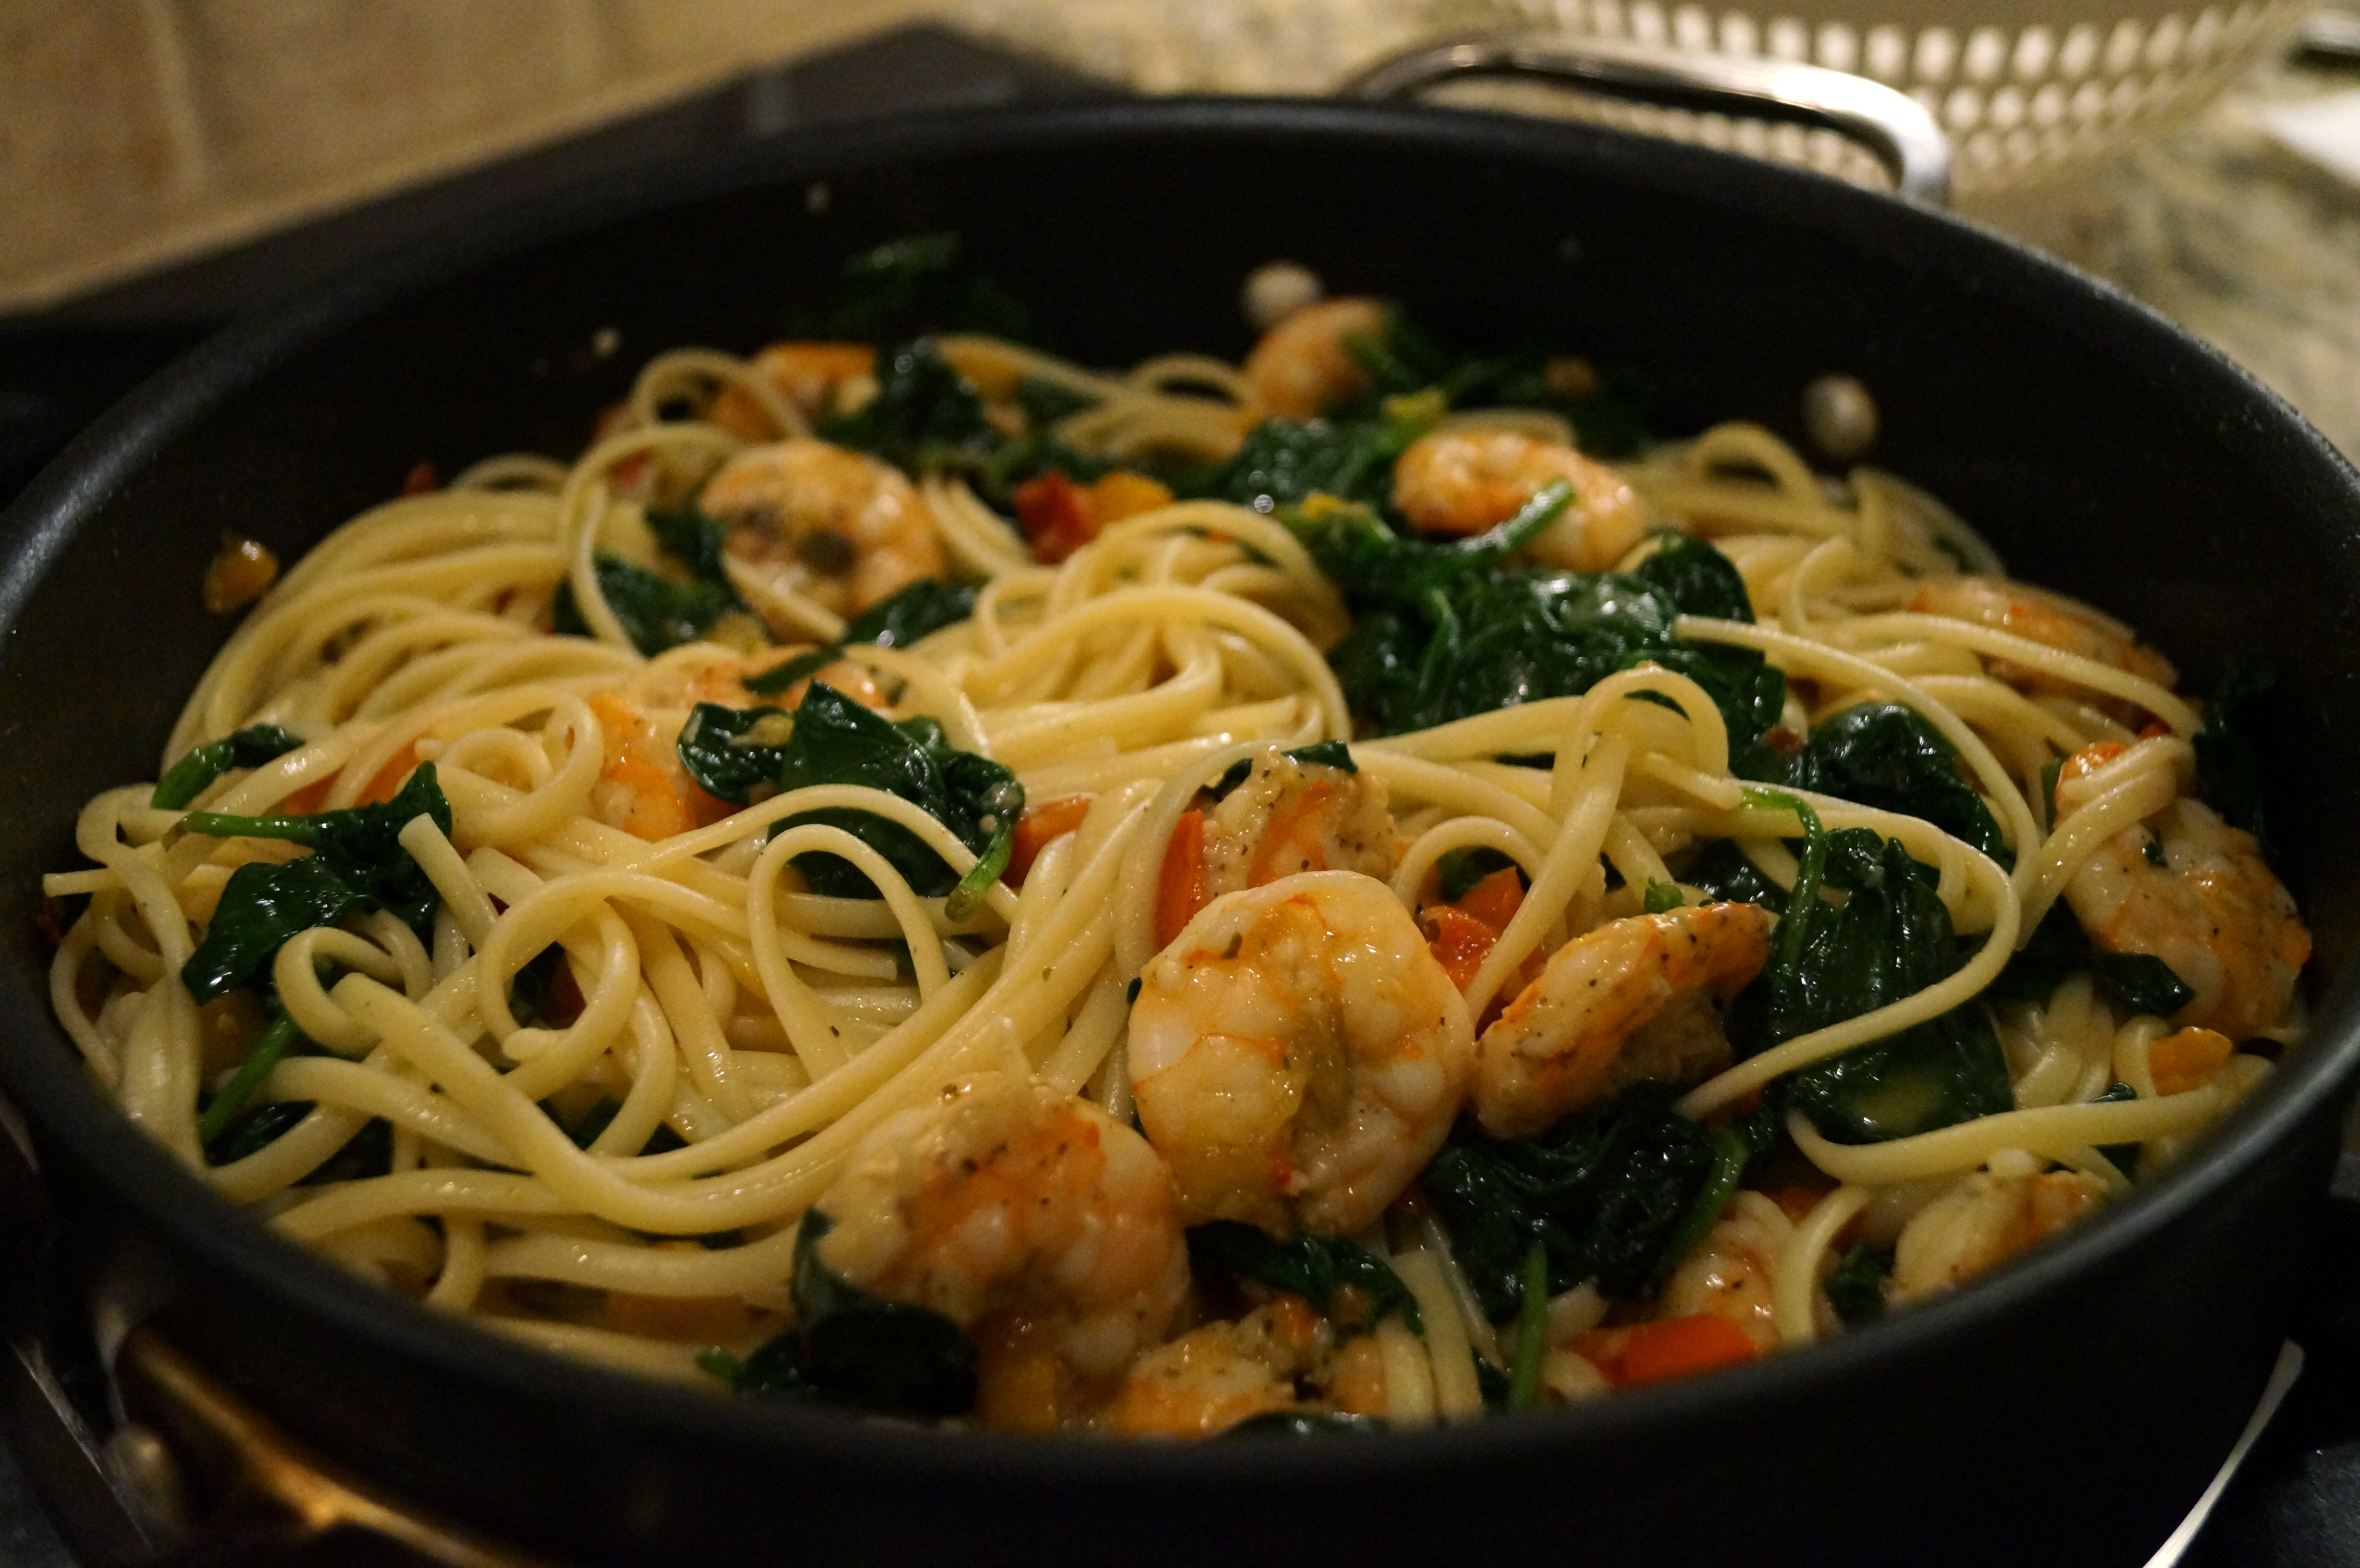
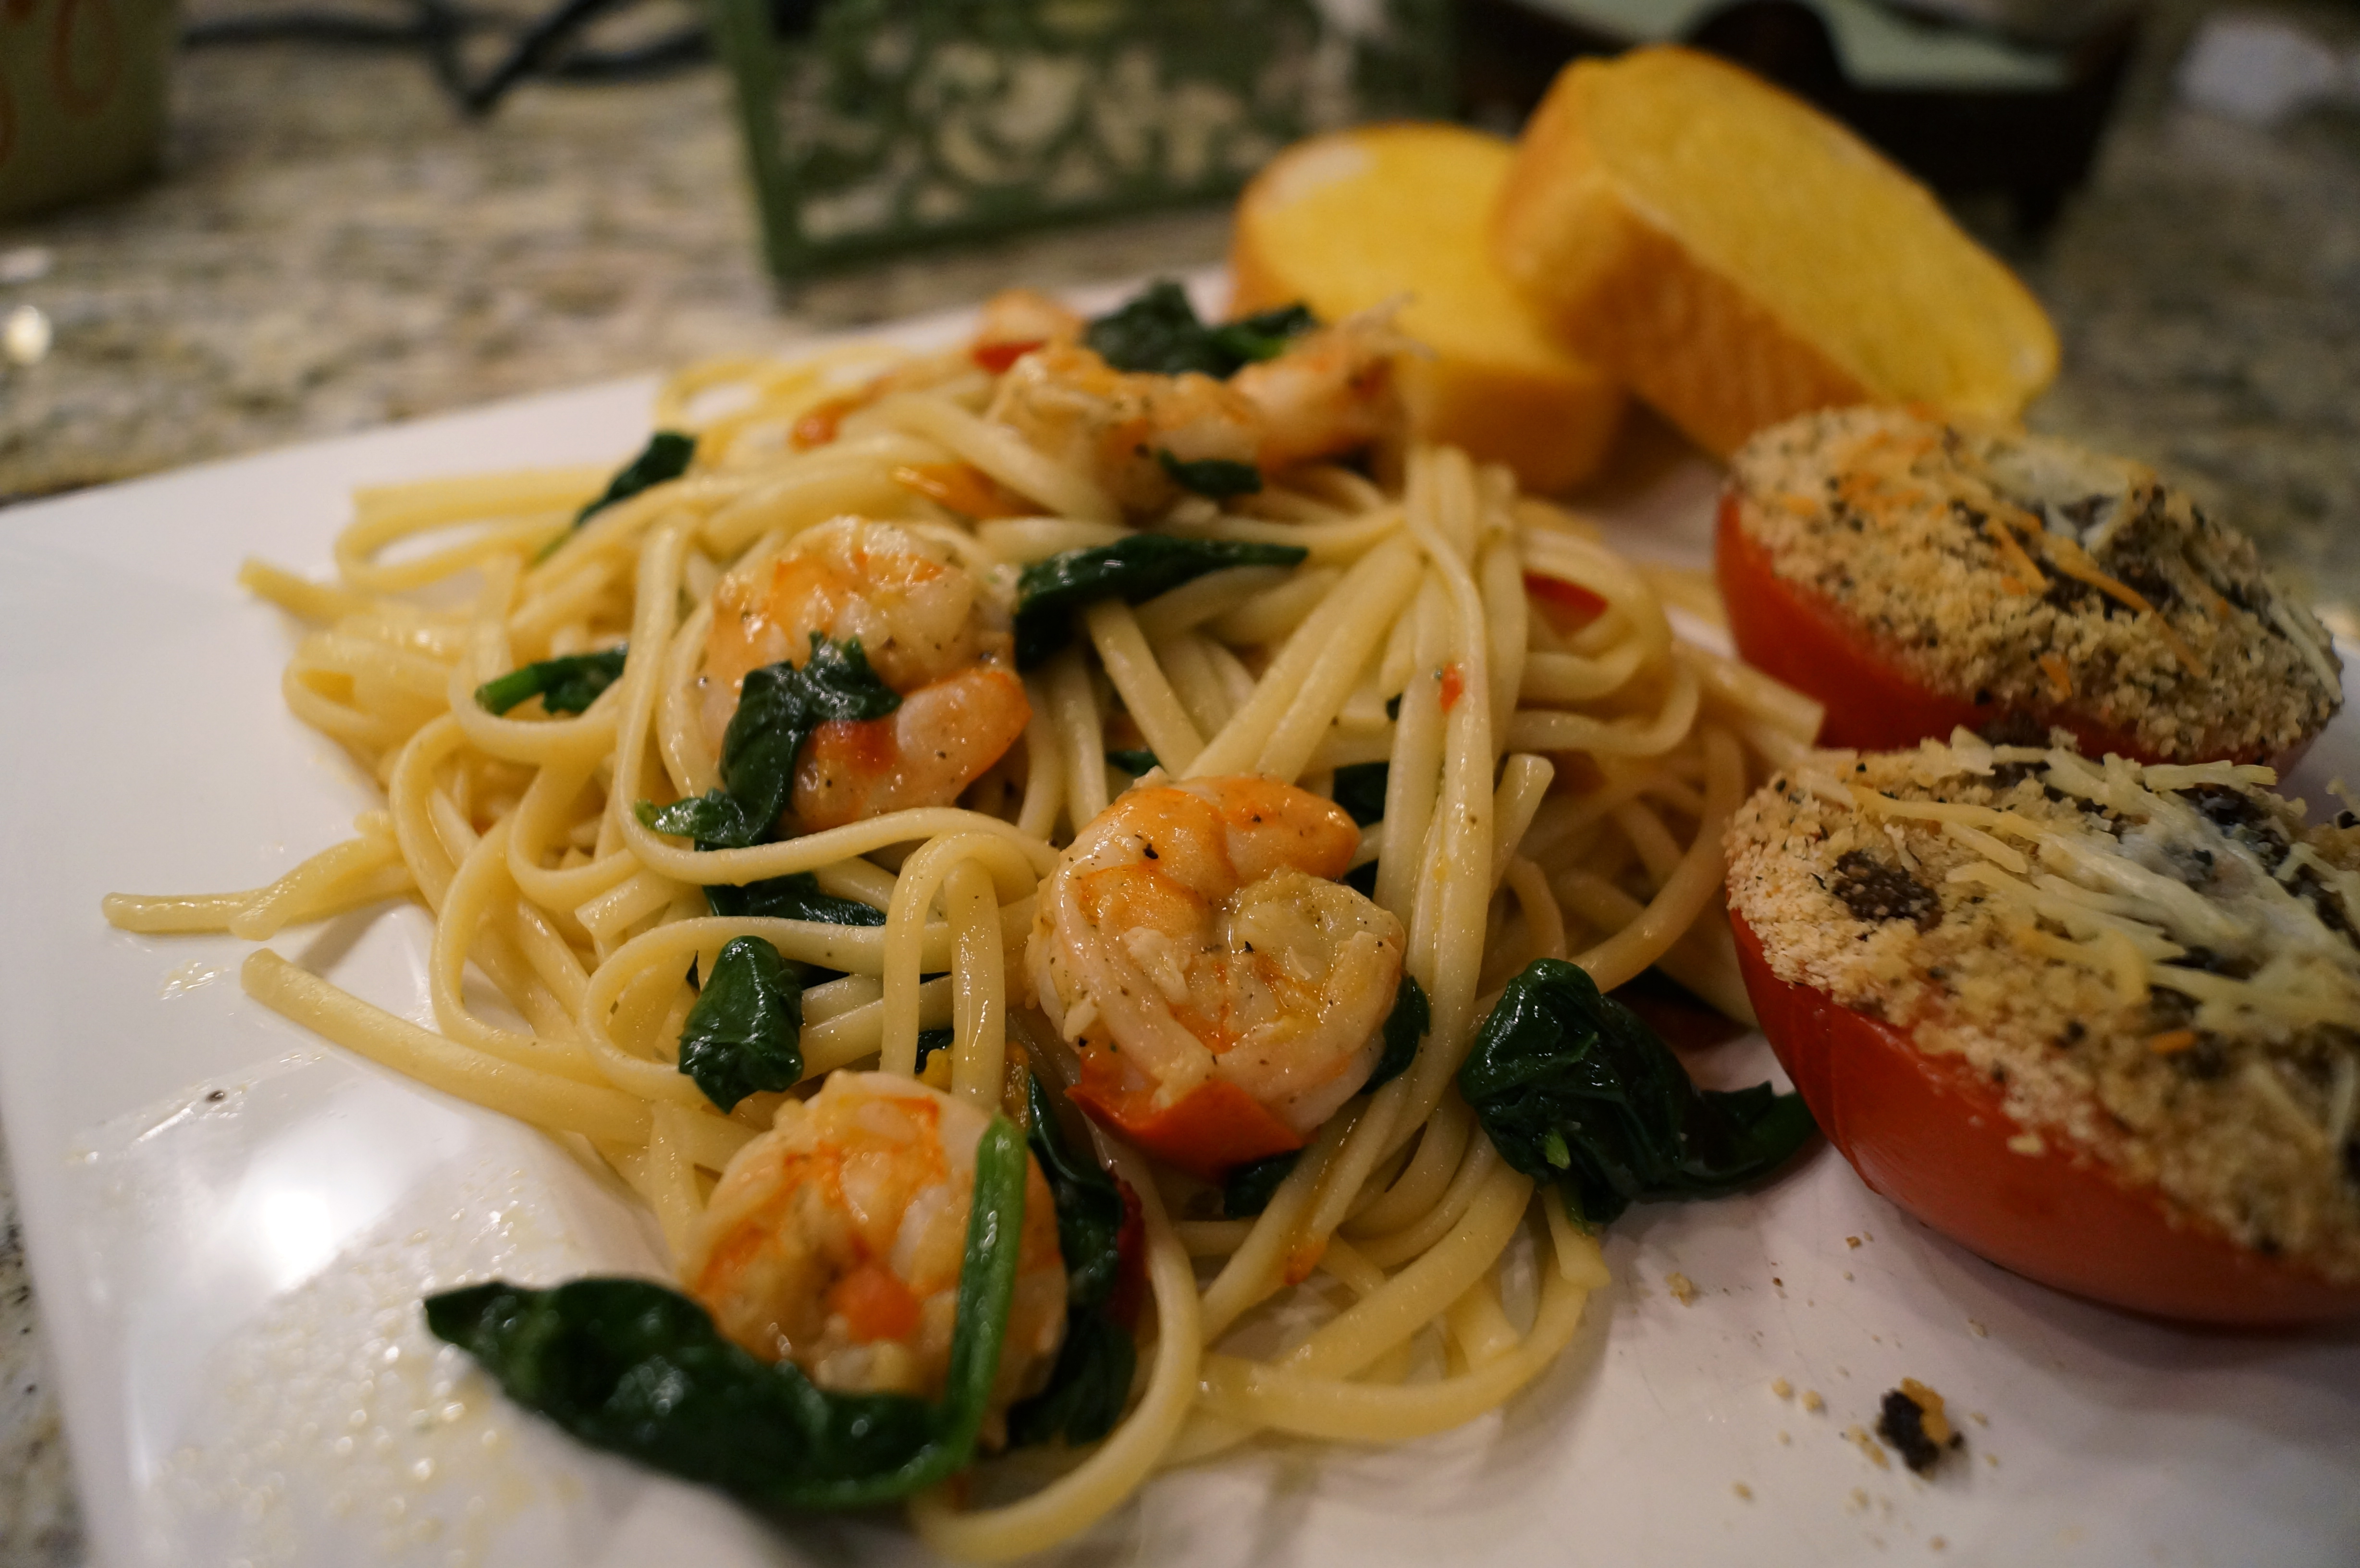
Shrimp and Spinach Pasta

  • 1 lb fresh shrimp, peeled and deviened
  • 5 medium, vine ripened tomatoes
  • 3 cups, lightly packed spinach
  • 5 cloves garlic, minced (jar kind is fine)
  • garlic salt
  • pepper
  • paprika
  • 1 teaspoon Italian seasoning
  • 4 tablespoons butter, divided
  • 1 tablespoon olive oil
  • 1/4 cup lemon juice
  •  A pinch of crushed red pepper, more if you light more heat.
  • 8-10 oz of cooked fettuccine
  • Grated Parmesan cheese

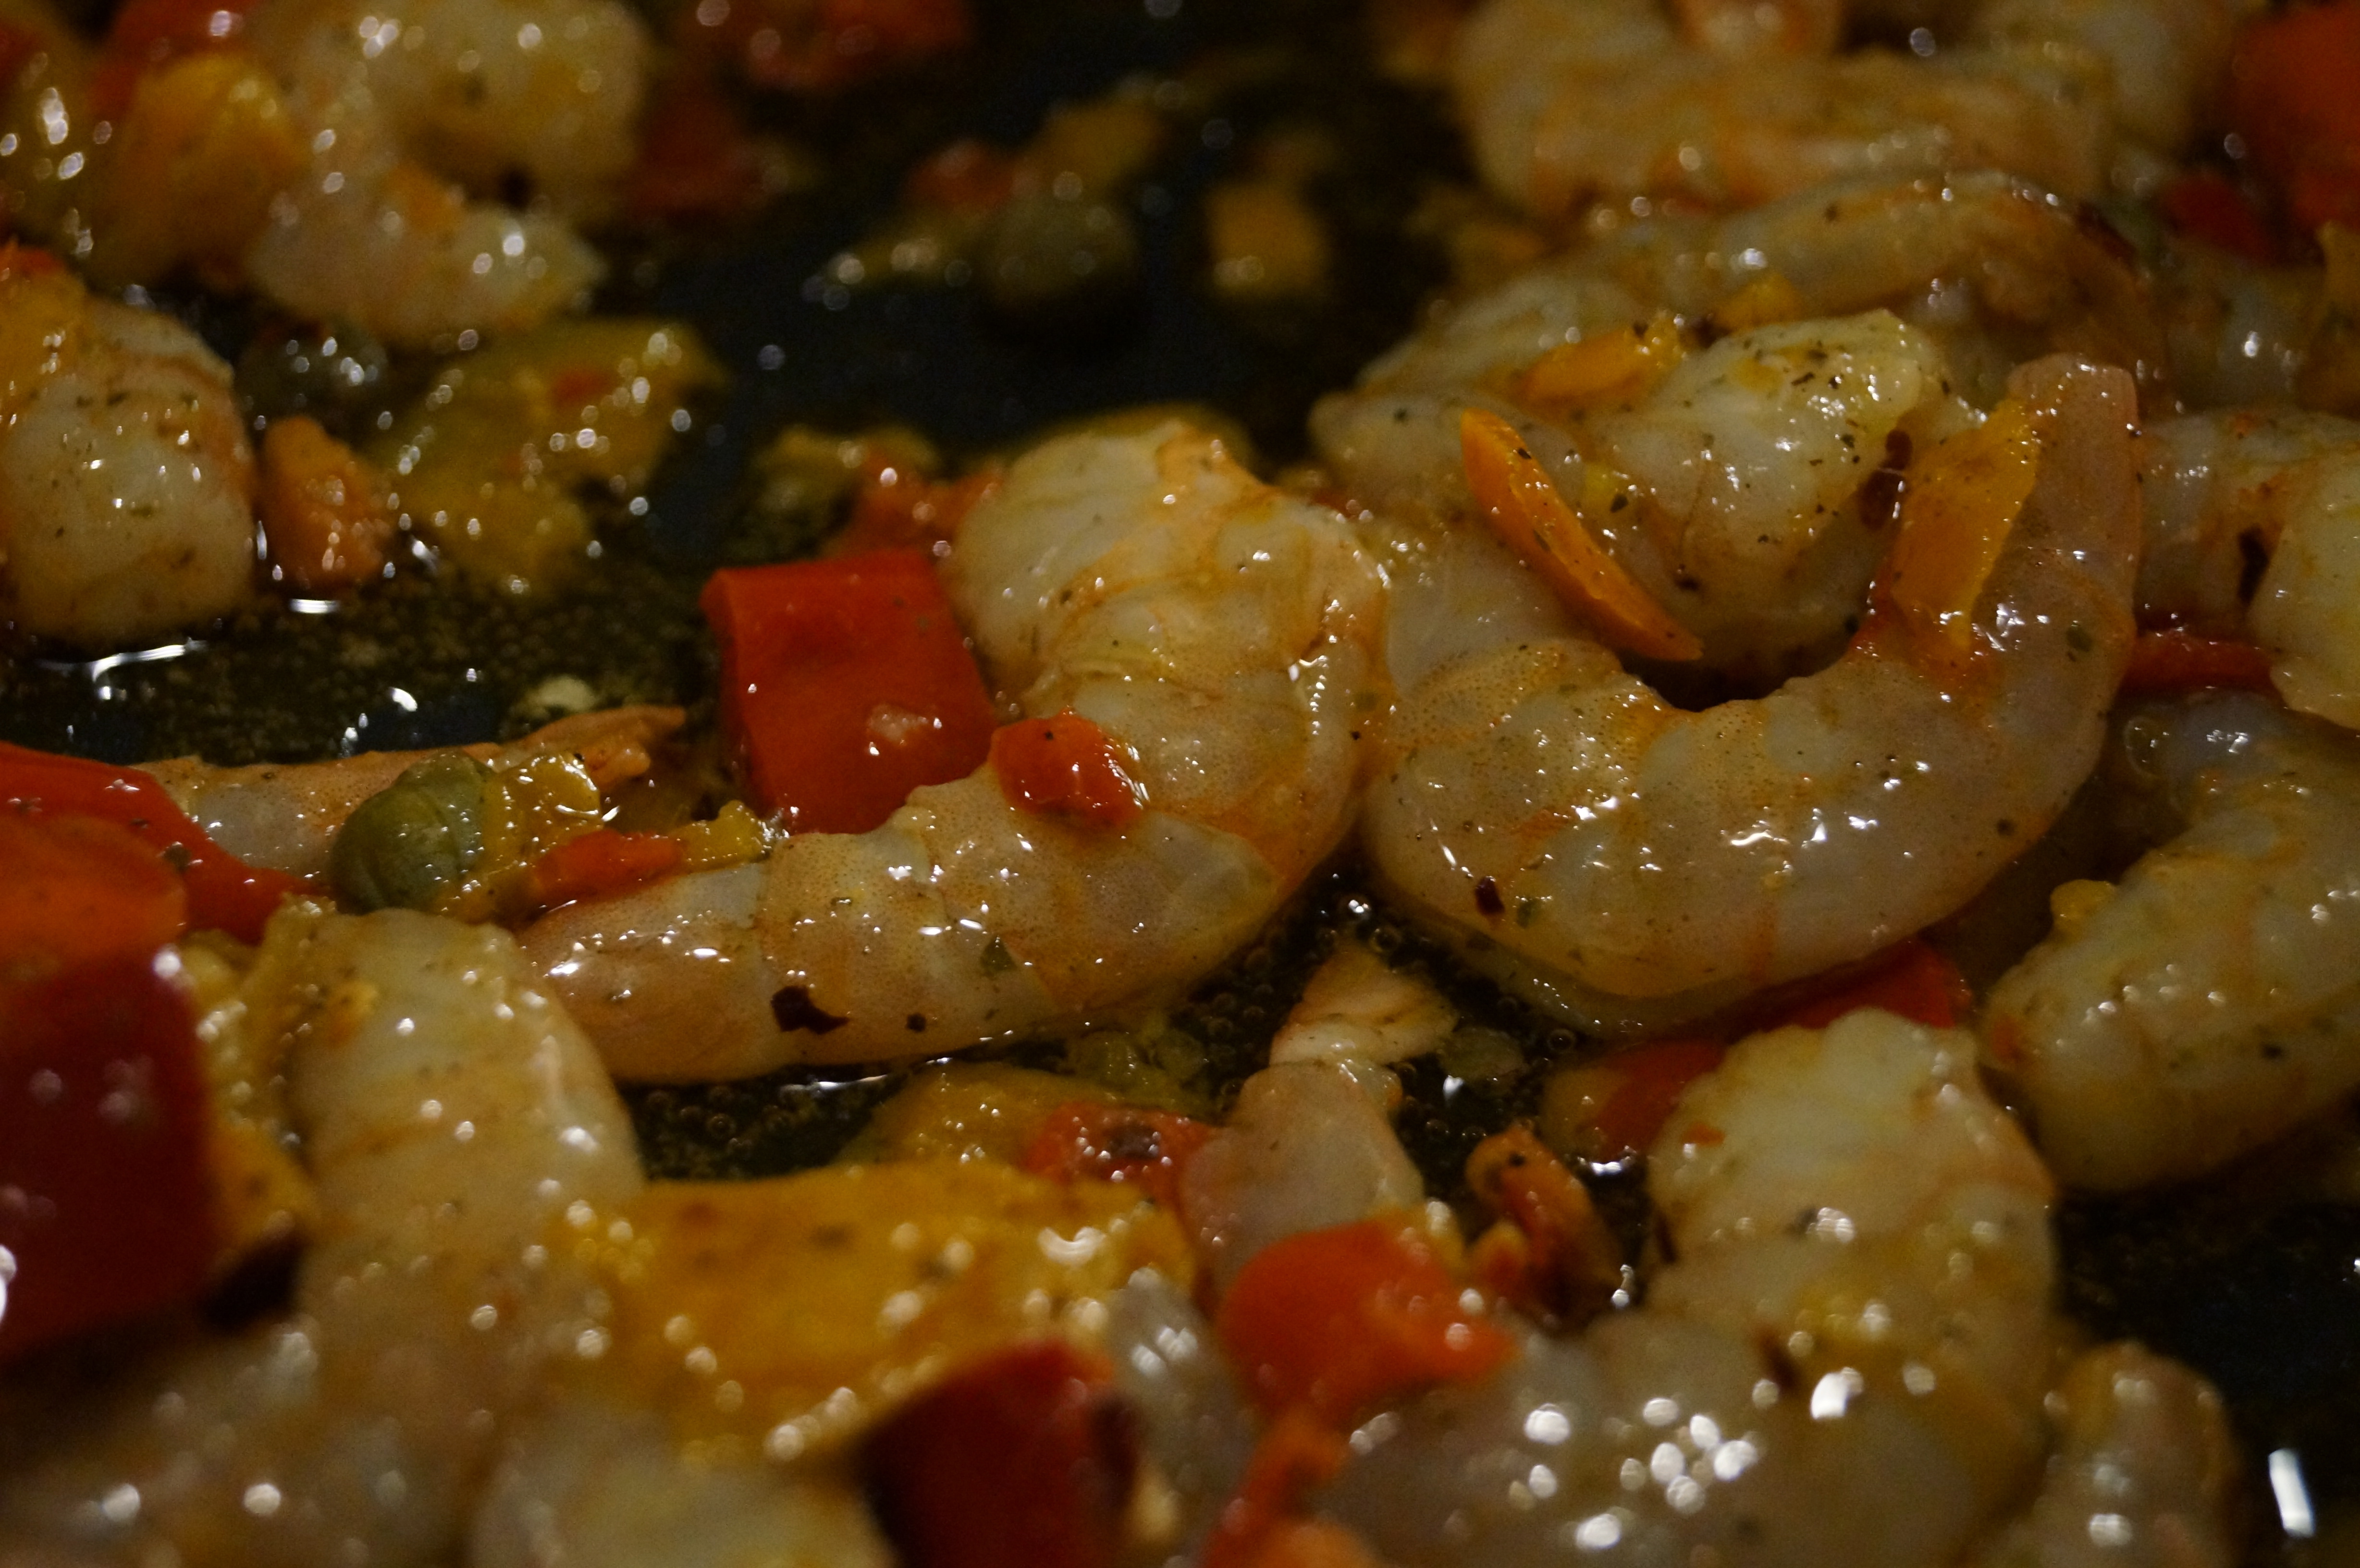
Season shrimp with pepper, paprika and garlic salt.

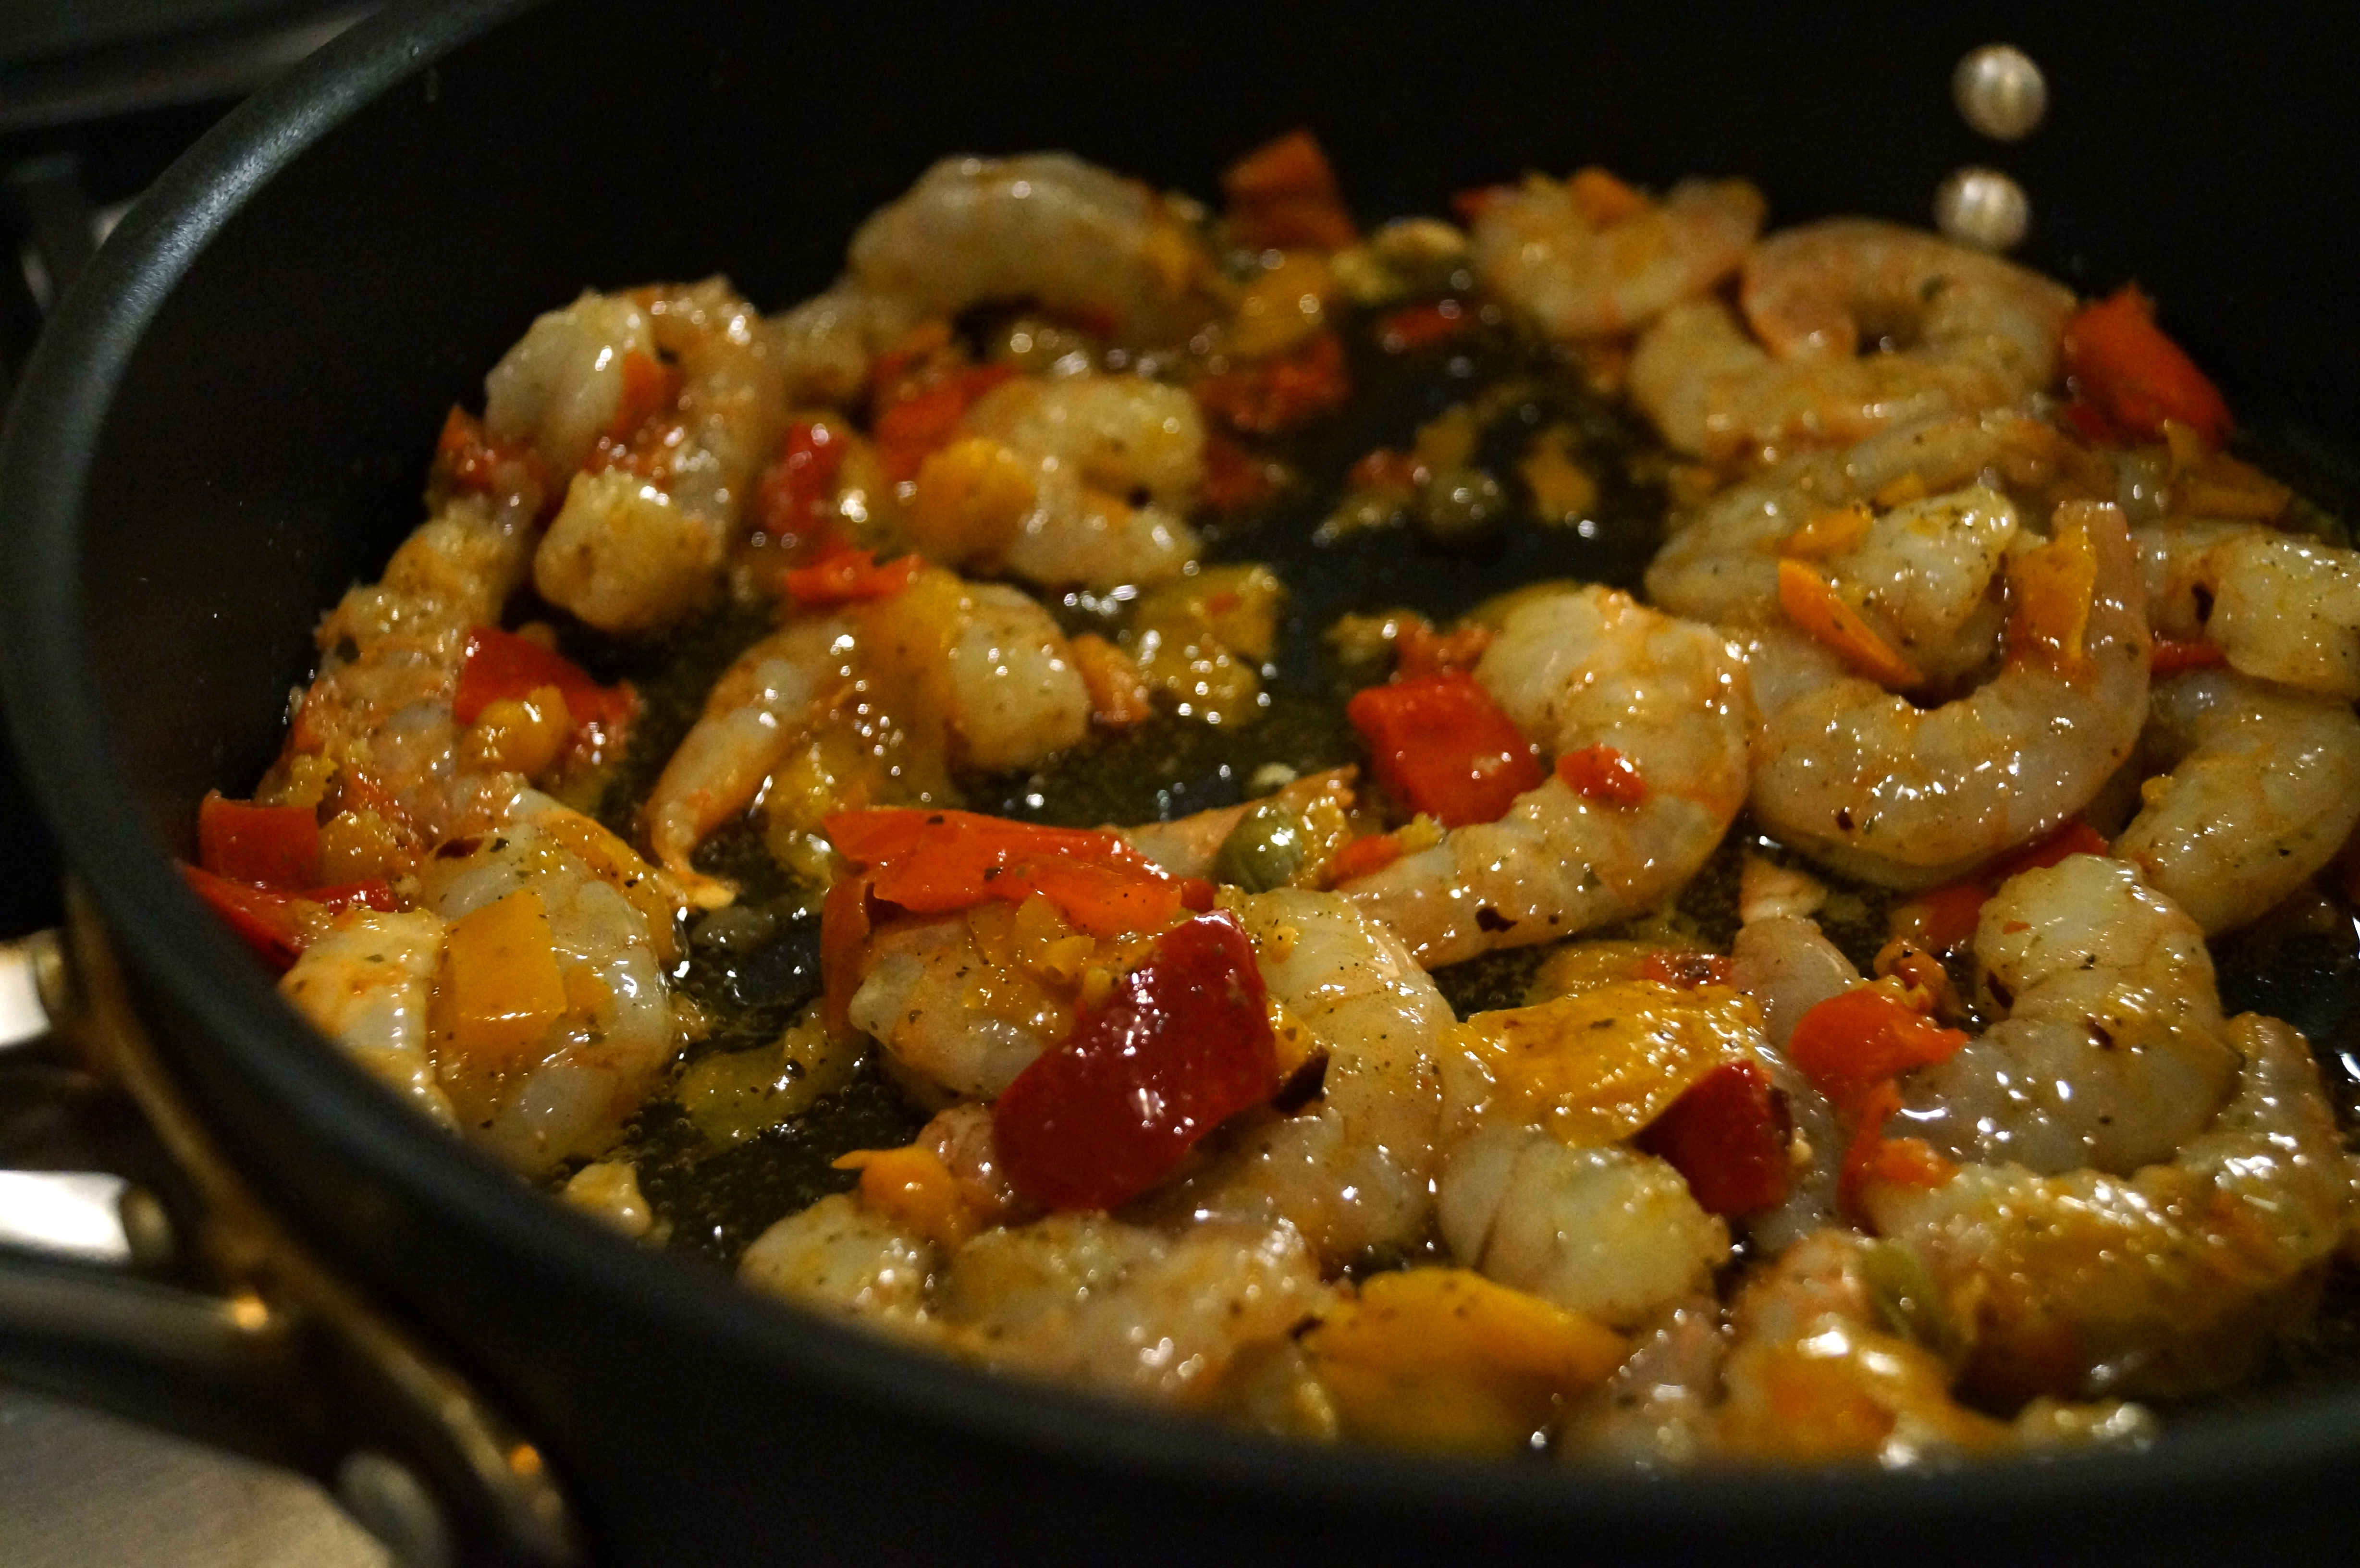
Heat 2 tablespoons butter and 1 tablespoon olive oil in a large skillet over medium/high heat.  Add shrimp and cook for 2-3 minutes per side, or until no longer translucent.

Once cooked add in garlic and cook for 30 seconds or until fragrant. Next, add tomatoes, lemon juice, red pepper, Italian seasoning and the remaining 2 tablespoons of butter. Stir and cook over medium heat for 2-3 minutes.

Finally, add in fresh spinach, cover for a few minutes  to wilt then stir to combine.

Salt and pepper to taste.

Serve over cooked fettuccine and top with Parmesan cheese.

-abp

“See your disappointments as good fortune. One plan’s deflation is another’s inflation.” ~ Jean Cocteau

It’s that time of year again!

The time when you can totally not feel bad about making a meal out of grazing for hours over the best appetizers there are to offer.

Well, at least that’s how we normally do the Super Bowl.

This year, it’s just going to be me and the hubs so we really don’t need several dips for just the 2 of us. Although, I still wanted a Super bowl party feel meal.

Que the Chicken Wings!

I have never attempted to make these at home so I thought what a good time to give them a go.

Baked Buffalo Chicken Wings

  • 20 chicken wings
  • 1/2 teaspoon salt
  • 1/2 teaspoon pepper
  • 3/4 cup plus 1 tablespoon hot sauce, divided
  • 1 tablespoon vegetable oil
  • 3/4 cup Gold Medal® all-purpose flour
  • 1/2 teaspoon cayenne pepper
  • 1/2 teaspoon garlic powder
  • 1/2 cup (1 stick) melted butter
  • 2 Gallon Ziploc bags
  • Blue Cheese or Ranch dressing for dipping

Place the salt, pepper, 1 tablespoon hot sauce, and vegetable oil into Ziploc bag, and shake to mix. Add the chicken wings, seal, and toss until well coated.

In the second Ziploc bag, place the flour, cayenne pepper, and garlic powder and shake to mix. Pour the chicken wings from the first bag into the flour bag, seal, and toss until well coated with the flour mixture.

Place the wings onto the prepared baking sheet rack, and place into the refrigerator for at least 1 hour.

Preheat oven to 400°F.

Line a rimmed baking sheet with foil. Set a wire rack on the baking sheet and coat it with cooking spray.

Melt the butter in a medium microwave safe bowl. Whisk in the hot sauce.

**If you want to skip this last step, you can buy your favorite jarred wing sauce – mine is Franks – and use it instead. **

Dip the wings into the butter mixture one at a time, and place back on the baking sheet rack.

Bake in the preheated oven until cooked through and crispy on the outside, about 1 hour, turning half way through baking.

IMG_0082

“New Orleans is like the bad-kid island in ‘Pinocchio.'” ~ Jonah Hill

Happy Fat Tuesday!!

I have never experienced Mardi Gras but it is definitely on my bucket list.  I will probably start off a little easy by trying out the Mobile Mardi Gras then one day hit up the big shebang in New Orleans.

So, since I’m not there I thought I would have a little Mardi Gras (minus the beads) celebration here at home with Jambalaya and mini King Cakes.

Mini-King Cakes

(adapted from the Chew)

Cakes

  • 1 refrigerated pizza dough
  • 4 tablespoons Butter (melted; plus more for brushing)
  • 1/3 cup Granulated Sugar
  • 1/3 cup Brown Sugar
  • 3/4 teaspoon Cinnamon
  • 3/4 teaspoon Lemon zest
  • 1/3 teaspoon Salt

Frosting

  • 1½ cup powdered sugar
  • 6 tsp milk (may need more to get right consistency)
  • 1/2 tsp vanilla
  • yellow, green and purple colored sugar

Preheat oven to 350º and grease an 8-10 inch cake pan.

Combine sugars, cinnamon, lemon zest and salt by smashing together with fingers.

Roll out dough on a lightly floured surface, brush with melted butter and sprinkle with sugar mixture.

Roll dough lengthwise to form a log and cut into 1½ inch pieces and place cut side down on to prepared cake pan. Brush cakes with melted butter.

Bake for 20 minutes or until golden brown but not crispy.

While cooking, mix together powdered sugar, milk and vanilla.

When cakes are cooled slightly, flip onto an inverted plate, frost and sprinkle with colored sugar.

These would be great anytime of the year – just change up the color of the sugar to match the season or occasion.

20140304-192344.jpg

-abp

IMG_0128

“A kiss makes the heart young again and wipes out the years.” ~ Rupert Brooke

I love Valentine’s Day – the love, the candy, the colors.  It’s just a fun but low key holiday. A time that you can be cheesy in love with your significant other or other family members.

My husband’s favorite type of food is Italian, so in honor of my sweetheart this Valentine’s Day week, I am making three Italian dinners. The first one being a very simple dish that on a plate doesn’t look so simple.

Would be a great 1st dinner you cook for a new love! 🙂

Sweetheart Tomato and Basil Chicken

(adapted from Menu Musings of an American Modern Mom)

  • 1 lb fettuccine
  • 4 chicken cutlets
  • Kosher salt and fresh ground pepper
  • Dry Italian seasoning
  • 2-3 Tablespoons olive oil
  • 2 pints of cherry tomatoes (halved and quartered)
  • 2 Tablespoons minced garlic (I used the jarred kind to save time)
  • 4 Tablespoons cold butter
  • ¾ cup basil – divided (cut into ribbons)
  • Parmesan Cheese

Start water for fettuccine and heat up olive oil in large pan on medium/high heat.

Season both sides of chicken with salt, pepper and Italian seasonings.

Brown chicken for 4-5 minutes on both sides.

Add in tomatoes, garlic, ½ cup basil and butter. Cook down for about 5 minutes. Season to taste with salt and pepper.

Cover and keep warm until fettuccine is ready.

Serve chicken over pasta with sauce and top with remaining basil and Parmesan cheese.

Love on a plate!

Sweetheart Tomato and Basil Chicken | Poore Amy-abp

“Trips to the dentist – I like to postpone that kind of thing.” ~ Johnny Depp

I better enjoy the last few weeks of my pregnancy and my newly found sweet tooth!!

Because once she gets here – someone is going to have to pull that sweet tooth!!

I’ve always been a fan of sweets but I would usually rather have a second helping of the savory dish at hand and pass on dessert.

Not anymore.

I had whipped up these Graham Cracker Toffee Bars last Saturday to go with the Vegetable Beef Soup and I ate my one (good-sized) bowl, pushed it aside and stuck my hand into the plate of Toffee Bars.

6 times.

Yep, I ate six, without even moving from my chair.

I know I’m having unusual cravings but seriously folks – they are THAT good!

Graham Cracker Toffee Bars

  • 24 Graham Crackers
  • 1 cup butter
  • 1 cup brown sugar
  • 1 cup chopped pecans
  • 1/2 cup mini semi sweet chocolate chips

Preheat oven to 350º.

Line a baking pan with parchment paper (you will need 2 or 1 if you half the recipe like I did) and lay out graham crackers

In a sauce pan over medium heat, melt butter and sugar, stirring constantly. Bring to a boil – careful not to scorch. Stir in pecans.

Pour melted butter/sugar over crackers and bake for 10 minutes.

Remove and sprinkle with chocolate chips.

Allow to cool completely and the break apart.

photo-8You can thank me later!

-abp

“Without an open-minded mind, you can never be a great success.” ~ Martha Stewart

I have always loved omelets but have also been afraid of them.  It was always easier just to scramble the eggs.

So when I told my husband I would be attempting an omelet for dinner, I warned him that he would more than likely end up with scrambled eggs.

But alas! It worked and I must say I’m pretty proud of myself.

When contemplating making omelets, I have always envisioned the good old hearty cowboy omelet with tons of cheese, onion, ham, bacon, tomatoes etc. because that’s how I always order my omelets (i.e. IHOP). But my health conscious better half (my husband) always liked the lighter style with no cheese and just herbs – he ordered one in NYC this past June, shared with me and I have to admit – you don’t need all the hoopla to be good.

So, when perusing one of my Martha Stewart mags – I came across the recipe “The French Omelet” and I just knew this would score me brownie points with the hubs. But to do so, I must first overcome my fear of omelet making.

The fear is now gone, which is a good thing because I have a feeling this will be requested frequently.

The French Omelet

(adapted from Martha Stewart Magazine)

  • 3 large eggs (room temperature)
  • 1 teaspoon water
  • Large pinch of coarse salt
  • 1 Tablespoon unsalted butter – ½ cut into small cubes
  • 1 Tablespoon fresh tarragon, chives, chervil (or other fresh herbs you may have), finely chopped (I used chives and parsley)
  • Freshly ground pepper, to taste

1. Add eggs, water and salt to bowl and whisk with fork until blended.

2. Add cubed butter, herbs and pepper. Stir to combine.

3. Heat a non-stick 10 skillet over medium-high heat for 30 seconds.  Add butter, melt, swirl to coat pan.

4. Add egg mixture and let sit for about 15 seconds or until edges start to set.

5. (Here’s the tricky part) Holding a fork flat, stir the eggs (not touching bottom) in a figure 8 pattern with one hand while shaking the skillet back and forth with the other. Keep incorporating edges into running center until almost completely set.

6.  Turn off heat, tilt skillet away from you and roll the omelet onto itself, then fold in the other side. Press slightly to seal and slide onto plate.

7. Garnish with extra herbs.

photo-34

See – that wasn’t so bad. 😉

-abp

“When you are asked if you can do a job, tell ’em, ‘Certainly I can!’ Then get busy and find out how to do it.” ~ Theodore Roosevelt

I’ve been putting some thought into my blog – I’ve been away for such a long time.  The whole pregnancy thing has totally flipped my world around –  in a good way!

Lots of things changed for me – for a while I wasn’t able to cook (thanks to hyper-sensitive smell), I totally changed my work schedule up and I had/have a whole new list of “to dos”.  My totally patterned life was no more. I’m completely out of sync.

Also, I’m not quite as savvy as a lot of bloggers out there and it would take me quite some time to get a post complete because I wanted everything as perfect as I could make it – the prep, the pictures, the finished product and the written part.

With this being said – I felt I couldn’t get it all done, at least not the way I would want it done.  I thought about just stopping for a while and coming back to it later in life but that’s not really what I wanted to do……

So – I have decided to omit the instructional pictures and just give a finished photo – that way if I am making something for dinner that I would like to share, I can because I would not have to take all the extra time of taking several pictures of each step (nor edit them) – I could just make dinner like I normally do and take a picture before I dig in.

See that’s the thing you might not know about some blogs that I have discovered while trying to improve mine. One being – a lot of them cook solely for their blog – they prepare dinner at 10 am so that the lighting is the best for pictures, etc.  Some even have spread sheets for the week! Please take note!! – I think that is AWESOME and I enjoy them very, very much and I am very thankful that they do these things – it’s just I have realized that I do not and can not have a blog like that, they are professionals and I am an amateur – which I’m totally cool with! 🙂

I cook for me and my family like I always have and that’s what I’ll continue to do.  And I want to continue to share it with everyone but to do that, I will have to simplify a bit.

I’m just being honest with myself and you and I hope that you will continue to follow my blog minus a few pictures. (P.S. – when the baby comes I’m sure there will be another hiatus! Talk about my world being flipped upside down! :))

Thanks again! I look forward to posting more yummy food!

On that note – I present you with a very delicious and easy dessert that could finish off any meal perfectly.

Oven Baked Churros

(adapted from myrecipes.com)

  • 1 (17.3-oz.) package frozen puff pastry sheets, thawed
  • 1/4 cup sugar
  • 1 teaspoon ground cinnamon
  • 1/4 cup melted butter
  1. Preheat oven to 450°. Unfold and cut puff pastry sheets in half lengthwise, and cut each half crosswise into 1-inch-wide strips. Place strips on a lightly greased parchment paper-lined baking sheet. Bake 10 minutes or until golden brown.
  2. Meanwhile, combine sugar and cinnamon. Remove pastry strips from oven, and dip in butter; roll in cinnamon-sugar mixture. Let stand on a wire rack 5 minutes or until dry.

Oven Baked Churros

Oven Baked Churros

Enjoy!

-abp

“One man’s poison ivy is another man’s spinach.” ~ George Ade

Ok, so I’ve been MIA for a little bit.

I have a good excuse – I was out of town for close to a week and as I’ve explained before I am not one of those people who claims to be able to do it all.

I can’t and I know it.

So what is takes to get everything taken care of to get out of town and everything it takes to get it all straightened out when you get back has kept me busy.

I’m pretty much back in the swing of things so tonight I am making Shrimp Scampi with Roasted Peppers and Spinach.

This is a Publix Apron Meal that I ran across while making this weeks grocery list.

Shrimp Scampi with Roasted Red Peppers and Spinach

  • 3 cloves garlic, crushed
  • 1 oz parmesan cheese, shredded
  • 8 oz linguene
  • 2 Tbs olive oil
  • 1/2 cup Gia Russa sweet pepper bruschetta topping
  • 12 oz shrimp, peeled and deveined
  • 1/4 tsp crushed red pepper flakes
  • 1/2 tsp salt, divided
  • 1/2 tsp pepper, divided
  • 1/2 cup chicken broth
  • 3 Tbs butter
  • 6 oz baby spinach

Cook and drain pasta.

pasta

Saute garlic in oil until it slightly browns.

DSC03338

Add shrimp, topping, pepper flakes, 1/4 tsp salt, 1/4 tsp pepper. Cook and stir for 1 minute.

DSC03341 DSC03340

Add broth and cook for 2-3 minutes or until reduced by half and shrimp are pink and opaque.

DSC03343DSC03346

Reduce heat to low and add in butter, spinach, cheese and remaining salt and pepper. Cook and stir until butter and cheese is melted and spinach is wilted.

DSC03349DSC03350

Add in pasta, stir to coat and heat through.

DSC03352

Serve and spinkle with a little extra cheese.

Scrimp Scampi with Roasted Peppers and SpinachScrimp Scampi with Roasted Red Peppers and Spinach.  pooreamy.com

I found it odd that this shrimp scampi did not have lemon in it and to be honest, I missed it.  I would add a couple tablespoons of lemon juice to the next batch.

Hope everyone’s week has started out well!

-abp

“Be always at war with your vices, at peace with your neighbors, and let each New Year find you a better man.” ~ Benjamin Franklin

Happy New Year Everyone!!!

Whew, what a year it has been!

Oh! have I ever enjoyed the holidays! So much so that is why I sit here working on my blog at 9:00 p.m. on New Years Eve. I am exhausted. I have had 3 dinners for 6-10 people in the past month and am preparing for 2 parties at my house in the next 10 days. Because of this I have spent the last two days ridding my house of all things Christmas, along with trying to get this place back into an organized state.

That is why at 8:00 tonight I was already in my pj’s cleaning out the pantry.

I am ONE WILD WOMAN.

3 years ago I could not have even imagined such a New Years Eve but tonight I am very happy. And very blessed.

You would think with all the entertaining I have been doing I would have had lots to blog about – I did – but I was lucky just to get it all cooked and on the table. There was no time to take pictures and even less time to get them uploaded.

But tonight I did cook and actually had time to take a few pictures so hopefully this will get me back in the swing of things.

It was also my very first time to prepare Cornish Hens.  All in all they turned out very well considering I made a blunder that I did not even notice until we started to eat. 🙂

That I will explain later.

Cornish Hens

  • 4 Cornish Hens
  • 6 Tablespoons melted butter, divided
  • ¼ cup beef consomme
  • ¼ cup light corn syrup
  • salt and pepper

Preheat oven to 375°. Prepare roasting pan with a rack sprayed with cooking spray. Rinse hens and pat dry. Place breast side up on rack. Brush with 2 tablespoons melted butter and season with salt and pepper. (Ok, this is where I messed up – I thought I had them breast side up but I did not – so yours should be flipped upside down compared to these pictures.)

DSC02858

Mix together remaining butter, consomme and corn syrup.

DSC02863

Roast hens for 30 minutes. Baste with mixture.

DSC02873

Roast for 15 more minutes. Baste with mixture.

Roast for 10 more minutes. Baste with mixture.

Roast for 10 more minutes. Baste with mixture.

Roast for 5 more minutes.

Remove from oven and serve on a bed of seasoned rice and your choice of green vegetable.

DSC02875

DSC02878

DSC02886Very easy but makes a very nice presentation.

I hope everyone has a very safe and happy new year!!!!

abp

“The secret to staying young is to live honestly, eat slowly, and lie about your age.” ~ Lucille Ball

It’s definitely starting to feel like fall around here, so like everyone else I feel like doing something pumpkiny.  I have found several recipes that look interesting but I’m a sucker for blondies/brownies so when I happened upon Pumpkin Butterscotch Blondies on the blog The Baker Chick I knew that was the one!

Oh and by the way – today is my birthday, so if I want to eat the whole pan. I can. 🙂

Tonight a group of my friends and family are going to Hokkaido Japanese Steak and Sushi Bar and I cannot wait!!!! I looooove me some fried rice!!! This will be the first time I have been since the original was destroyed in the April 27, 2011 tornado – so happy to have them back!!

Alrighty then, on to the blondies.

Pumpkin Butterscotch Blondies

  • 2 cups all-purpose flour
  • 1 tablespoon pumpkin-pie spice
  • 1 teaspoon baking soda
  • 3/4 teaspoon salt
  • 1 cup (2 sticks) unsalted butter, room temperature
  • 1 1/4 cups sugar
  • 1 large egg
  • 2 teaspoons vanilla extract
  • 1 cup canned pumpkin puree
  • 1 package (12 ounces) butterscotch chips

Preheat oven to 350°

Spray the bottom and sides of a 9×13 baking dish with non-stick spray.

Mix the first 4 ingredients in a medium bowl and set aside.

Next cream butter and sugar on medium high speed with an electric mixer.

Then beat in egg and vanilla.

Beat in pumpkin puree.

Reduce speed to low and mix in the dry ingredients until combined.

Fold in butterscotch chips.

Spread evenly into prepared baking dish.

Cook for 30-45 minutes or until sides start to pull away and an inserted toothpick comes out with just a few moist crumbs.

Cool completely and cut into squares.

I then served it warm with whipped cream, chocolate chips and pecans.

ahhhh……the flavors of fall – you just can’t beat ’em!!

As you can see, I like a little crunch so next time I would add pecans when baking. When trying a new recipe for the first time that I am pretty sure I would like nuts in, I usually wait because pecans are pretty pricey and I want to make sure I like the recipe before I add them.  But that is just me – they are pretty awesome without nuts too!

I hope you have had a chance to sample several goodies this fall season! If you have not – this would be a great one to try!

abp